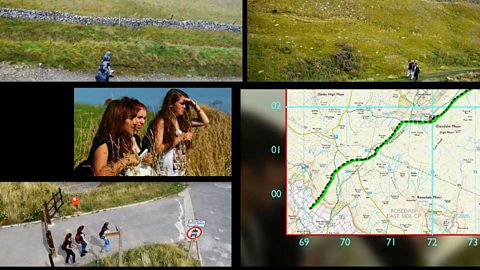
This clip demonstrates how to use the scale of a map to calculate distance.
Video
KS3 Geography. Maps and navigation.
Using maps to work out distance.
JOE CROWLEY: Because maps are drawn to scale they’re perfect for working out the exact distance between two features on the landscape. And there’s a number of ways of doing this.
The first thing you need to establish is the scale of the map. The typical maps used by walkers are the Ordnance Survey Explorer maps. These are to the scale of 1:25 000, so every measurement on the ground is exactly 25,000 times larger than on the map.
You’ll find the scale noted on the front of the map, with more details on the bottom of the map itself. An easy and very quick way of gauging distance is to look at how many blue lines your route covers. On a 1:25 000 scale map each of these blue lines - called eastings and northings - are a map equivalent of a kilometre apart. Count how many lines your route covers - and whether it’s in a straight line or not - and you’ll be able to make a rough estimate of the distance you’ll be travelling.
However, you may want to be more precise. If a path is straight, you can measure it simply using a ruler. And on this map one centimetre is 250 metres, therefore four centimetres is a kilometre. And if you want to know how long that is in miles look at the key at the bottom of your map where you’ll find details of how to work out the relevant figure.
But of course, in real life paths are rarely straight. So you can use a piece of string to trace your route…and then simply measure that length.
Download/print a transcript of the video.
Joe Crowley explains that because maps are drawn to scale, they can be used to calculate the exact distance between two points.
Maps have different scales - a popular scale is 1:25,000. Joe points out on a map that this means that every measurement on the ground is exactly 25,000 larger than shown on the map. Each map will tell you its scale on the legend section. On the 1:25,000 series, this means that one centimetre on the map equals 250 metres in the real world.
One way to gauge distance is to look at the blue lines on the map which denote eastings and northings. Each line is 1km apart, so by counting how many lines your route crosses, you can make a rough calculation of distance. But routes are rarely straight, so Joe shows how to calculate length using a piece of string.
This clip is originally from the series Get Lost.
Teacher notes
Download/print the Teacher Notes for this episode (pdf).
Before watching the video
Ask students how features can be located on a map. Show students a range of different maps at different scales, for example a 1:25,000 map and a map of the world. Ask students if how they would find a location would differ between the maps.
Show students a range of map symbols and ask whether they can identify what the symbols are representing.
Ask students how much area is covered by a grid square and how they can calculate the distance between two locations.
Introduce key terms such as:
Scale: The ratio between a distance on a map and the corresponding distance on the Earth’s surface.
Eastings: The vertical lines on a map running from top to bottom and divide the map from west to east.
Northings: The numbered horizontal lines on a map.
During the video
You may wish to stop at relevant points during this short film to pose questions and check understanding or wait until the end.
Useful questions might include:
- What scale map can walkers use?
- What are northings and eastings?
- How can you calculate a distance on a map?
- What is 1cm equivalent to on a 1:25,000 map?
- What can you use a piece of string for on a map?
After watching
Use OS maps with your class asking them to pick out different locations on the map and try to measure the distance between them. If it is a straight-line distance a ruler could be used, however if it is a not a straight line a piece of string can be used to wind between the points between the locations. This can then be held against a ruler to help measure a distance.
Students could also plan routes between two locations using different types of paths. They could describe the route between the two using geographical vocabulary, including compass directions.
1:25,000 and 1:50,000 maps could be used to show the differences in scale and how the distance between two points remains the same, despite the maps looking different.
If you have the opportunity to take students outside of school, this would be a great opportunity to get students practising using a map and applying to the real world.
Where next
The Ordnance Survey website provides a great opportunity to practice different skills and gain helpful hints and tips on all aspects of map reading.
Curriculum notes
This clip will be relevant for teaching Geography.
This topic appears in OCR, Edexcel, AQA, WJEC KS4/GCSE in England and Wales, CCEA GCSE in Northern Ireland and SQA National 4/5 in Scotland
More videos from this series
Co-ordinates and grid references. video
How to use latitude and longitude or grid references to work out precise location.
Contour lines and gradients. video
Demonstrating how contour lines can be used to understand gradients.
Public rights of way. video
Explaining how to use maps and signposts to work out public rights of way.
What is 'geocaching'? video
Geocaching - a high-tech treasure hunt anyone can play with a smartphone.